How to place an image perfectly on a Squarespace website
Note: This post describes how to place images using the previous design editor for Squarespace. The Fluid Engine Editor for Squarespace 7.1 allows you to add images in place without using spacers.
Placing images exactly where you want them on website pages and blog posts can be tricky and frustrating. In this blog post, you'll learn how to place images exactly where you want them in Squarespace. These examples use the Inline style of images, the one I most often use.
Keep in mind that placing images exactly where you want them is only relevant when people view your website from a computer. When they visit your website from their cell phones, images are stacked above or below the text.
The tools I use are:
Horizontal guidelines
Vertical guidelines
Embedded image markers
Spacers
Divider lines
Watch the video on YouTube
Tutorial Video - Kerry A. Thompson
Using horizontal guidelines
Place an image below text
Drag and drop the image at the horizontal guideline below the text. If you have multiple columns, drag the image around until you see a shorter-length horizontal line that matches the column you want to add the image to. Then drop the image below the text.
Place an image above text
Drag and drop the image at the horizontal guideline above the text. If you have multiple columns, drag the image around until you see a shorter-length horizontal line that matches the column you want to add the image to. Then drop the image above the text.

Example of using the horizontal line that shows the width of the column as a guide before dropping the image above the text
Using vertical guidelines
Place an image to the right of a paragraph of text in its own column
Drag and drop the image to the right of the vertical guideline next to the text. If you have multiple rows of text, drag the image around until you see a shorter-length vertical line that matches the paragraph of text you want the image to appear next to. Then drop the image to the right of the text.
Drag the vertical sizing tool to the left or right if you want to resize the width of the text or the image.
Place an image to the left of a paragraph of text in its own column
Drag and drop the image to the left of the vertical guideline next to the text. If you have multiple rows of text, drag the image around until you see a shorter-length vertical line that matches the paragraph of text you want the image to appear next to. Then drop the image to the left of the text.
Drag the vertical sizing tool to the left or right if you want to resize the width of the text or the image.
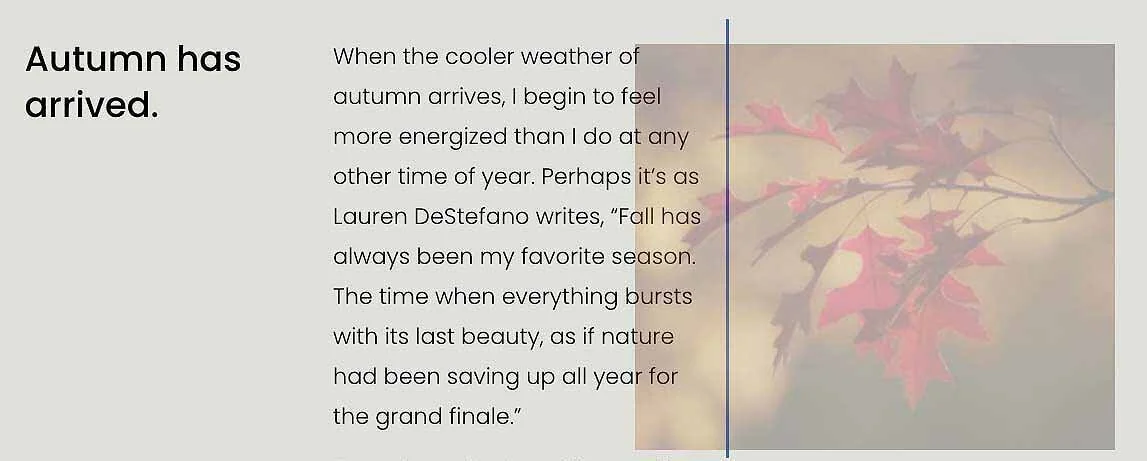
Example of using the vertical line that represents the area next to the text as a guide before dropping the image to the right
Using embedded image markers to wrap text
Place an image on the right so text wraps around the image
Drag and drop the image when you see a blue rectangle appear over the top right of the text. Then drop the image over the blue rectangle.
Place an image on the left so text wraps around the image
Drag and drop the image when you see a blue rectangle appear over the top left of the text. Then drop the image over the blue rectangle.

Example of dropping the image when you see the embedded rectangle

Example of text wrapping around the image embedded on the right
Using spacers to add extra space
Add space next to an image
Drag and drop a spacer block to the left or right of an image to force it into a particular width. Drag the sizing tool to the left or right to resize the width of the spacer.
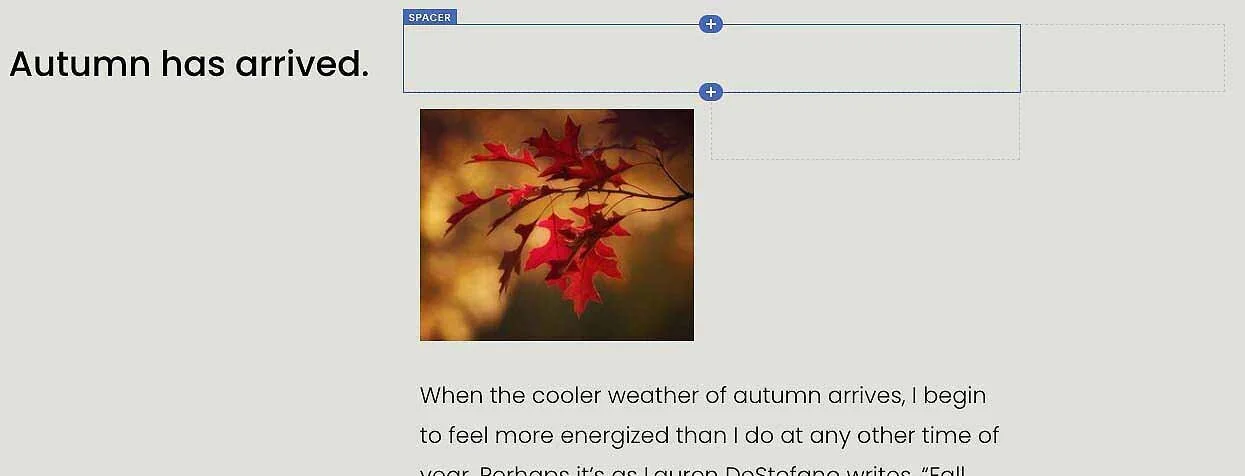
Add space above an image
Drag and drop a spacer block above the image to force the image lower on the page. Drag the sizing tool up or down to increase or decrease the size of the spacer.
Add space below an image
Drag and drop a spacer block below the image to create space below the image. Drag the sizing tool to increase or decrease the size of the spacer.
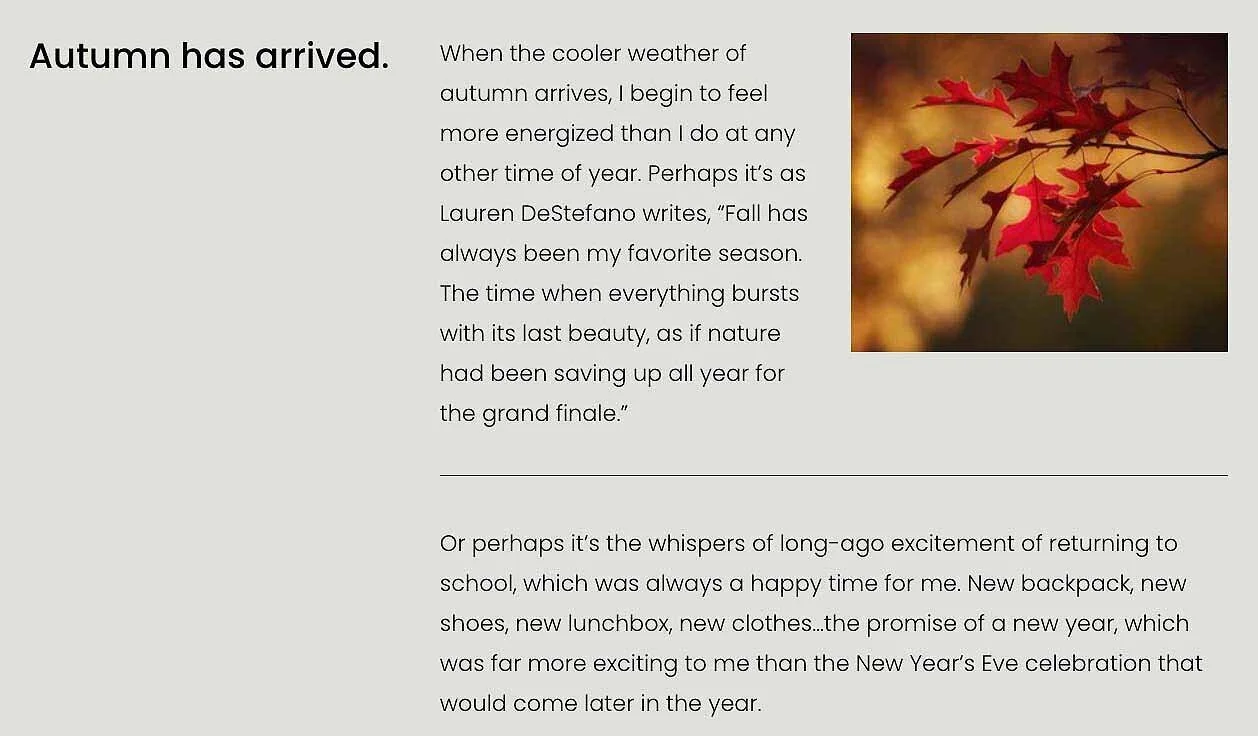
Example of spacers adding blank space above and beside an image. Spacers are ignored when the website is viewed on a cell phone.
Associating an image with a specific paragraph
If you have multiple paragraphs of text, but want the image to be next to, above, or below one particular paragraph, you'll need to separate that paragraph from the others. You use a divider line to break the connection between one text block and another if the text blocks are “stuck” together and you can’t drop something in the right place.
Isolate the paragraph with a temporary divider line
Place a divider line block on the page somewhere below the text. Add a text block beneath the divider line. Cut the text that you don't want connected to the image and paste it into the new text block. Style the text to match its original style.
Drag and drop the image to its place with the first paragraph. When you're happy with its placement remove the divider. If you’ve placed the image next to the text, the text connected to the image will be narrower than the rest of the text below it.
Example of adding a temporary divider line to separate two paragraphs of text
Now that you know the different techniques you can use to place images on your Squarespace website, you may recognize some of the methods that Squarespace’s own designers used when they created your template’s demo pages. Try out some of these techniques to see if you have some favorites. And remember you can always move the image to its original position or discard changes if you don’t like what you’ve changed. Give your creative self some leeway to have fun!


